This is gonna be a rather big post (pun intended).
As
Bettcanard style, I like to show you picture by picture of my progress.
I'm a big fan of
Bioshock games and style, and I wanted to make a Big Daddy for a long time, and after some researching I fell in love with this art, the weathering and style of this suit is too awesome.
It's an official concept art from the developers of Bioshock.
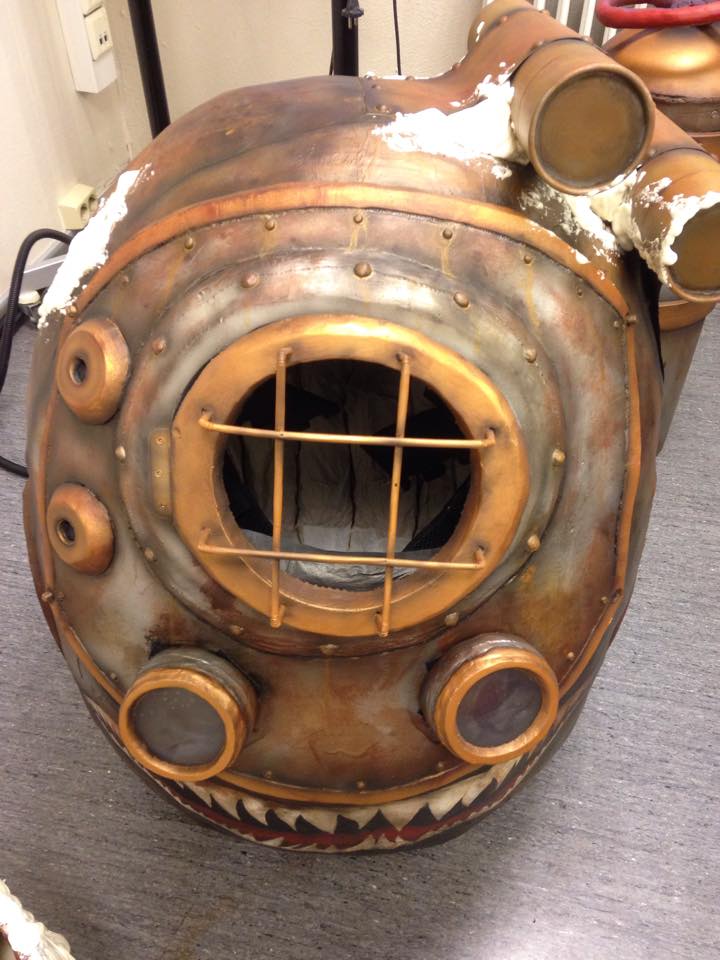
Starting with the head piece, where I first build a cage from metal wire, and some plastic tubes I bent to shape using with a heat gun. I connected that on some EVA foam as shoulder pads. This cage was for to be support for my paper mache to hang around, and the layer of paper mache was for the expanding foam to stick to. The whole helmet wall needed about 10 cm of expanding foam, so I had enough material to carve out the round shape.
Slip and slide, it's not always things go as planned. Suddenly this expanding foam didn't want to stick to the surface, so I had to use even more material and lay the whole thing on the side while adding the foam. Repeat for the other side.
After carving I used more paper mache (a mix of wood glue and water), on fine paper towel and smoothed it out evenly to get rid of any wrinkles. I made sure to make a hole for a widow (port hole) and a hole for each arm. Around the arm holes I attached a ring of EVA foam, I started of shaping the front piece, It is made of a couple of layers of EVA foam, and the bars in front of the window is only straws (for drink you know).
I heated the foam like this for it to shape the correct way and then I drew out the size I needed.
Here are the straws i mentioned. The small windows are attached with Velcro and will be filled with lights, the "glass" is plastic sheet.
Over to how I did the shoes and the armor.
All of it is mostly Eva foam, shaped with heat gun. Inside the shoes I used mattress foam for a better hold around my feet. and for holding the shoes together I used a bit of worbla on the shoe tips and and around the very bottom of the shoes, (point out this is the only place I used worbla). I glued faux leather fabric to the shoes, same fabric as I used for the gloves.
All armor pieces are shaped with a hand held sanding machine.
The gloves I stuffed with metal wire and polyester stuffing.
Pants and arms are build up by making a suit of mattress foam for thickness and sewn a fabric suit over. I painted the fabric with airbrush in yellow and brown tones so it looks weathered and worn out.
It is time for the base color of all the armor pieces. On the head piece I have attached two cardboard tubes (they was uses for deliver hair strainers, aka garbage I found laying around). I attached them with some pizza box cardboard and on the back I made a cage for the tank to sit in (there are no pictures of the concept art form behind so I just guessed this part out).
The cage is build of cardboard and EVA foam.
Base is wood glue at lest two lairs on all foam pieces so they wont soak up as much paint into the foam. then its a lair of acrylic gray paint on all pieces, and all of that is covered with silver spray paint. Light brown is added on all places that needed to be golden. On top of the light brown acrylic paint is one lair of gold acrylic paint. And simple base is done!
All the small rivets on the armor is made out of hot glue
It should have been a picture of all these brown pieces being golden, but i forgot to take a picture of that stage, but over to the start of the weathering.
I used airbrush to make dept in the armor and bring out highlights.
I hand painted a smile on the head and some numbers on the shoulder pad and a pin-up girl on the shield.
I painted rust with a mix between black, red and brown that I stippled on everywhere. For some more contrast and bulked weathering, I smeared some expanding foam here and there, mostly on the bottom of the pants and shoes. I painted all expanding foam in black and added a green mist with the airbrush over the top. All the barnacles is carved out of paper clay with some black airbrush mist over them.
That's all the progress pictures and since I love pictures then I will give you some of me actually wearing it in the end here. Photos taken by
Katrix
Thank you for reading
xoxo
Bettcanard